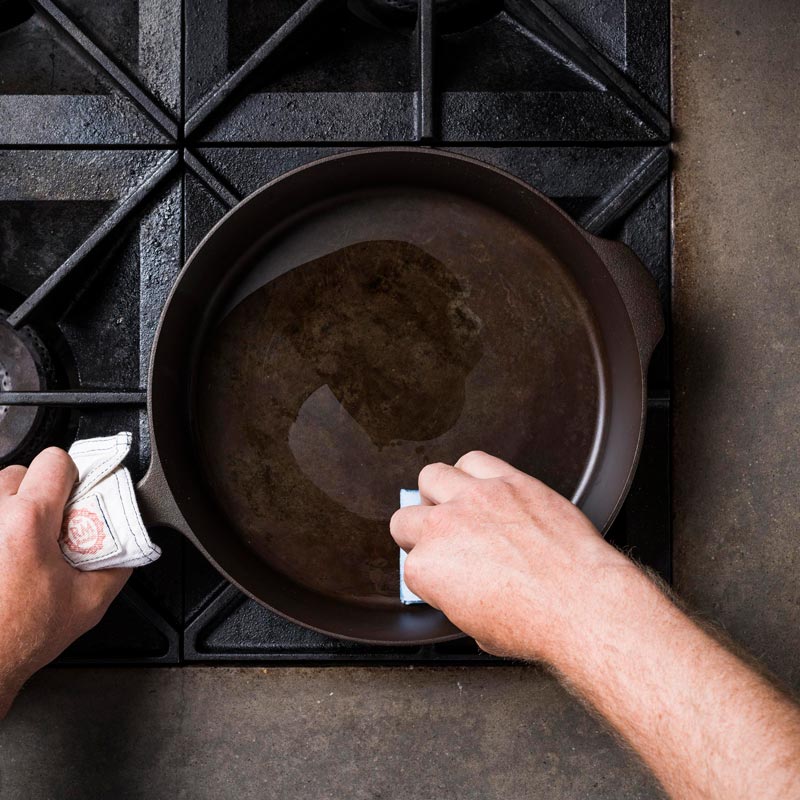
FREE US SHIPPING ON ORDERS OVER $200


Do I Need to Season a Pre-Seasoned Skillet?

These days, most cast iron manufacturers pre-season skillets, us included. You can cook with these pans right out of the box, but they won’t actually be totally non-stick. The Field Skillet, which comes coated with three seasoned layers of grapeseed oil, is actually less pre-seasoned than other producers, because we focus on baking seasoning into the pan, not on top of it. But we’ve found this approach develops better subsequent layers of seasoning over time, compared to other pans that try and speed up the process by covering up the iron with a more cosmetic top coat.

You don’t have to oven-season a Field Skillet, or any pre-seasoned cast iron pan; whether you want to is up to you. Early in the lifetime of your pan, some proteins like bacon and eggs may stick a bit. This is fine, and all part of the gradual seasoning process — and our Seasoning Oil is engineered to help. The most important thing to do is cook with it often, and to follow our guidelines below over the first 15 to 20 sessions with your pan:


What is Seasoning?

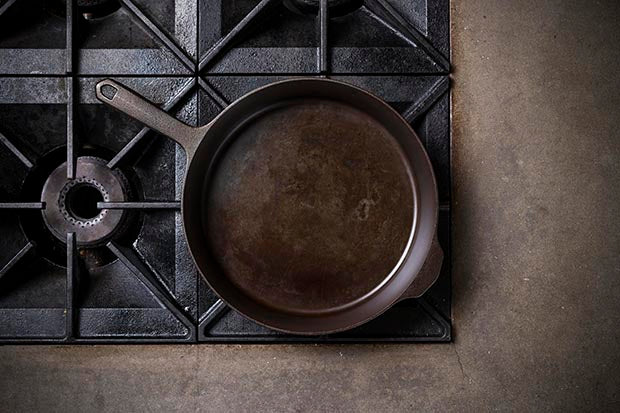
Seasoning is the black patina that builds up on your cast iron skillet with regular use, a non-stick surface that’s slick enough for eggs to skate across the pan, but tough enough to withstand the blazing heat needed to properly sear a steak. It’s the at-home work you do to turn a cast iron pan into an heirloom, and it’s as important for your cooking as the iron your pan is made from.

There’s a lot of advice on the internet about seasoning and cast iron care, and a lot of misinformation as well, so we want to set the record straight on what you really need to know to season a cast iron skillet correctly. We’ve spent years obsessing over how to make the best cast iron pan, which means we’ve devoted hundreds of hours to researching and comparing different ways to season it. That’s included testing a wide range of oils, heat ranges, and techniques while consulting chemists, machinists, and cast iron lovers around the country.

When subjected to high heat, long chains of fat molecules break down into short-chain polymers that bond with naturally produced carbon and bare iron, forming a kind of glaze. This is seasoning, and it has smooth, non-stick properties similar to Teflon. It also forms a natural barrier between the air and the naked iron in your pan, acting as the first line of defense against rust.

Seasoning will develop layer by layer, every time use your skillet.

If you put cast iron under a microscope, you’ll see that its surface is bumpy and porous, and those bumps and pores expand once the pan is heated. Seasoning, especially in the early life of a pan, bakes right into the iron, filling in those pores and smoothing everything out into an even surface. Over time, as layer after layer of seasoning builds up, the cooking surface eventually becomes pure seasoning, securely bonded to the iron underneath.

3 o'clock: raw iron
6 o'clock: pre-seasoned
9 o'clock: partially broken in
12 o'clock: bulletproof.


How to Naturally Season Cast Iron

We’ve found the best way to build seasoning is also the simplest: cook with your pan as often as you can. Every time you heat oil or fat for an extended period of time in cast iron, you have the opportunity to add a thin, durable patch of seasoning to your pan. These thin layers build on each other like coats of paint on a wall, slowly but surely forming a resilient, ultra-slick surface.

We designed Field Seasoning Oil for exactly this purpose: apply a dab after you use your skillet, and next time you heat it up, our blend of organic oils will help build durable, non-stick seasoning. Meal after meal, you’ll be adding to your skillet’s seasoning and improving its performance.

When it comes to good seasoning that lasts, we can’t stress the importance of thin layers enough. Compare it to thick coats of paint on a windowsill; once air and moisture sneak past the surface and work their way down to the wood beneath, those coats will start to peel off like a giant scab. In a pan, thick layers of seasoning will scrape off with normal use. Only the thin layers, molecularly bonded to the pan and each other, will stand the test of time.

In the early stages, an uneven cooking surface is a good sign: as you cook, your cooking surface will continue to develop interlocking layers of seasoning.

At the beginning, this won’t look pretty. Factors like what and how you cook, hot spots on your stove, and even the exact angle of your stove will shape how initial coats of seasoning form. They’ll likely appear in patches, darker in some spots than others, rather than a perfectly even layer. But patchy seasoning is actually a good thing—it allows layers of seasoning to interlock with and strengthen each other for a truly durable coat of seasoning.

Breaking In Your Skillet

Cook with fatty foods, and be generous with butter and cooking oil

A couple tablespoons of oil or a good hunk of butter will keep everything well lubricated while pan-frying or sauteing. (Don’t be afraid to add more!) You can use any fat you like, though if you want to cook with seasoning specifically in mind, you can stick to grapeseed at the beginning.

Keep the heat low

In the early life of a pre-seasoned pan, even one you’ve oven-seasoned yourself, your food may stick a bit. Keep the heat to low or medium as you build up your initial layers of seasoning; caramelizing onions, frying chicken, and baking cornbread are all great starter dishes. Once you’ve broken your pan in, you can let the pan take more abuse.

Avoid acidic and long-simmered foods

Tomatoes, wine, citrus, and vinegar can eat away at seasoning, so keep the tomato sauce out and avoid deglazing for now. A lightly seasoned cast iron pan may even add unpleasant ferrous flavors to acidic foods. Once you’ve completed the breaking-in stage and seasoning is producing reliable non-stick performance, a little acid here and there isn’t a problem.

Acidic foods like lemon, tomatoes, wine, and vinegar will eat away at seasoning, leaving a patchy cooking surface.

Great cast iron seasoning — and patina — comes from time and use. If you cook with your Field Skillet regularly, you will steadily develop a beautiful non-stick cooking surface.


Oven Seasoning

Some cast iron owners oven season every new piece of cookware they get, and then repeat the process every few months or years. This is a way to speed up the breaking in process, and can also address issues with your seasoning, such as rust.

Other cast iron owners never bother to oven season, opting for a slow and steady “keep cooking” policy.  This along with proper care, is our preferred method for building up durable, long lasting seasoning on smooth, machined cast iron. 

If you do want to oven season, we've got you covered with our well-tested steps below.

After testing every technique out there, we’ve developed an approach based on gradually boosting the temperature of the pan to bake the seasoning into the surface, not just on top of it. Your ideal seasoning temperature is just below the smoke point of your oil, the point where it breaks down into carbon and short-chain polymers that can bond with iron. Below that point for too short a time, and the oil won’t fully polymerize; above that point for too long, and the oil runs the risk of skipping past the polymer stage and straight into completely burnt carbon.

The best oils for cast iron seasoning

The best fat polymerization comes from oils rich in polyunsaturated fatty acids—the compounds that give ‘drying oils’ the ability to thicken and harden once exposed to air. After testing dozens of seasoning methods with all kinds of fats, our favorites are organic grapeseed oil and sunflower oilField Seasoning Oil uses both. These oils break down into tough but thin coats of seasoning that build well on each other over time.

Saturated fats like lard and coconut oil aren’t the best choice for oven-seasoning; as they break down, they don’t open sufficient bonding points for carbon molecules to adhere to the molten polymers. On the flipside, beware of drying oils that are very high in unsaturated fatty acids, such as flaxseed oil. While flaxseed oil is a popular choice on the internet, we’ve found the seasoning it produces can be brittle and prone to flaking. Grapeseed strikes a good balance, is easy to find in most supermarkets, and it’s also a great everyday cooking fat.

1.

Preheat your oven

Just to 200 degrees Fahrenheit. Most seasoning guides recommend blasting the oven as high as it will go, but we’ve found a lower, slower baking creates a stronger coat of seasoning that stands the test of time.

Meanwhile, heat your clean pan on the stove for 5 minutes to evaporate any lingering moisture. Once the oven is up to temp, put the pan in for 10 minutes, then remove it and increase the heat to 300. Pre-heating the pan this way ensures it’s completely dry and opens the iron’s pores to better soak up seasoning.

2.

Apply oil to your pan

Add a dab of Seasoning Oil to your Field Skillet. You’ll only need about ⅛ teaspoon of oil to season your cooking surface, but you want to start with more, to make sure you have even coverage before wiping away any excess.

Use a clean paper towel to rub the oil in concentric circles, then take a fresh paper towel and wipe up all the residue. Repeat on the bottom and handle with another ¼ teaspoon dab of oil. That’s it—no more oil than that. When you’re done wiping up excess oil, the pan should look dry, with a dull matte finish. Though it might not look it, plenty of oil will still be on the pan, just in a super-thin layer, which is exactly what you want. Remember, your goal is to bake a layer of seasoning into the pan, not on top of it.

3.

Start slow

Once the oven hits 300 degrees, put the pan on the middle rack, upside down, which will prevent any oil from pooling at the edge of the cooking surface. After 10 minutes, remove the pan, place it on the stove, and carefully wipe away any oil that has accrued on the surface. Heat increases oil’s motor activity, and this is your last chance to whittle your coat of oil down to an even, super-thin layer before it really starts to break down.

4.

Then dial up

Increase the heat to 400, and when it hits temp, return the pan to the oven and leave it alone for an hour. To keep the heat constant, don’t open the oven at all. Leave it alone. Head outside and mow the lawn. Read a book. Let the oven do its thing. After an hour, turn off the heat and let the pan cure in the oven for another hour before opening the door.

5.

And cook

Oven-seasoning a pan once doesn’t mean it’s good to go forever. You can repeat this process a couple times, but your best bet for developing a glossy patina is to just cook with the thing. Now that you have a strong base layer of seasoning firmly bonded to the pan, your job is to reinforce it with the ultra-thin layers that result from everyday cooking. Seasoning-friendly meals are a great way to build on your new "base coat."

Shop This Post

The Field Skillet

User-friendlier cast iron.

Shop Now